
Concrete Nails: The Ultimate Guide for Durable Fastening
When it comes to fastening materials to hard surfaces like concrete, brick, or stone, regular nails often fail to deliver the strength and hold needed. This is where concrete nails step in—specialized fasteners designed to penetrate and secure items to rigid masonry surfaces. Whether you’re a DIY enthusiast hanging shelves, a contractor installing fixtures, or a homeowner tackling small repairs, understanding concrete nails is key to ensuring long-lasting, reliable results. In this guide, we’ll break down everything you need to know about concrete nails, from their design and types to their uses, selection tips, and safety best practices.
What Are Concrete Nails?
Concrete nails, also known as masonry nails, are heavy-duty fasteners engineered to penetrate hard, non-wooden surfaces such as concrete, cinder blocks, brick, and stone. Unlike standard nails (which rely on wood fibers to grip), concrete nails feature unique design elements that enable them to anchor into dense materials.
Key Design Features
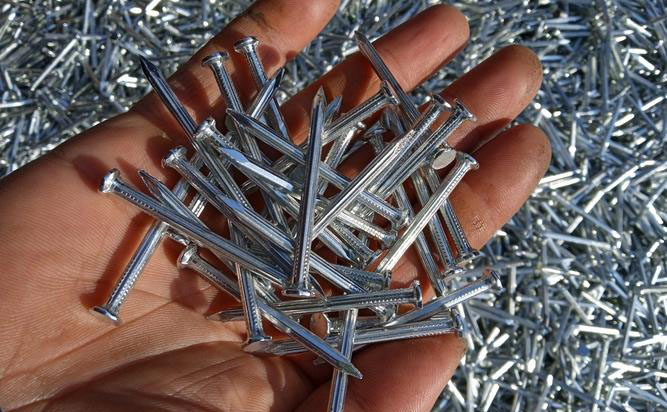
Hardened Steel Construction: Most concrete nails are made from high-carbon steel or heat-treated steel, giving them exceptional strength and resistance to bending or breaking during installation.
Sharp, Chisel-Like Points: The tip of a concrete nail is often tapered or chiseled to pierce through tough masonry without crumbling the surface.
Ribbed or Smooth Shanks: Some models have ribbed (textured) shanks to enhance grip once inserted, while smooth shanks work better for temporary installations or when minimal surface damage is desired.
Types of Concrete Nails: Choose the Right One for Your Project
Not all concrete nails are created equal. The type you select depends on the masonry material, the weight of the object you’re fastening, and whether you need a permanent or removable solution. Here are the most common types:
1. Common Concrete Nails
The most basic type, these have smooth shanks and chisel tips. They’re ideal for light to medium-duty tasks, such as attaching furring strips to concrete walls or securing small brackets. They work best with softer masonry (e.g., cinder blocks) and require a hammer for installation.
2. Ribbed Concrete Nails
Also called “deformed-shank” concrete nails, these have ridges or grooves along the shank. The ribs create friction inside the masonry, providing a stronger, more permanent hold than smooth-shank nails. They’re perfect for heavy-duty applications like mounting shelving units, TV brackets, or outdoor fixtures to solid concrete.
3. Cut Masonry Nails
These nails have a flat, cut tip (instead of a chisel tip) and a square or rectangular shank. They’re designed for use in very hard masonry, such as dense concrete or natural stone, as the cut tip helps split the material cleanly without cracking. They’re often used in construction projects where maximum holding power is required.
4. Drive Pins (Concrete Brad Nails)
Smaller and thinner than standard concrete nails, drive pins are used for delicate tasks like attaching trim, molding, or lightweight decorative elements to masonry. They require a power tool (e.g., a pneumatic nailer or electric hammer drill) for installation and leave minimal surface damage.
5. Plastic-Coated Concrete Nails
These nails have a plastic coating that acts as a buffer, reducing noise during installation and preventing rust (ideal for outdoor or damp environments). The coating also improves grip by creating a tighter seal between the nail and the masonry.
What Are Concrete Nails Used For?
Concrete nails are versatile fasteners, but their primary purpose is to secure objects to masonry surfaces. Here are some common applications:
Interior Home Projects: Hanging shelves, towel racks, curtain rods, or picture frames on concrete walls.
Exterior Projects: Attaching siding, trim, or outdoor lighting fixtures to brick or concrete foundations.
Construction & Renovation: Securing furring strips, drywall tracks, or subflooring to concrete slabs.
DIY & Repairs: Fixing loose tiles, attaching garden edging to concrete paths, or mounting tool organizers in garages.
Industrial Use: Installing equipment brackets, cable trays, or safety rails in factories or warehouses with concrete walls.
How to Choose the Right Concrete Nails: Key Factors to Consider
Selecting the wrong concrete nail can lead to weak hold, surface damage, or even project failure. Keep these factors in mind when shopping:
1. Masonry Material Hardness
Soft Masonry (Cinder Blocks, Hollow Bricks): Use smooth-shank or ribbed concrete nails (common or plastic-coated). Avoid cut masonry nails, as they may split the material.
Hard Masonry (Solid Concrete, Natural Stone): Opt for cut masonry nails or ribbed nails with chisel tips—their hardened construction can penetrate dense surfaces without breaking.
2. Nail Length & Diameter
Length: The nail should be long enough to penetrate the masonry by at least 1 inch (2.5 cm) beyond the thickness of the object you’re fastening. For example, if you’re attaching a 0.5-inch thick bracket to concrete, choose a 1.5-inch nail.
Diameter: Thicker nails (larger diameter) offer more strength but may cause more surface damage. Use thinner nails (e.g., drive pins) for lightweight items and thicker nails for heavy objects.
3. Project Weight & Load
Light-Duty (≤5 lbs): Drive pins or small smooth-shank nails.
Medium-Duty (5–20 lbs): Ribbed concrete nails or common concrete nails.
Heavy-Duty (>20 lbs): Cut masonry nails or thick ribbed nails.
4. Environmental Conditions
Indoor/Dry Areas: Any type of concrete nail works.
Outdoor/Damp Areas: Choose plastic-coated or stainless steel concrete nails to prevent rust and corrosion.
How to Install Concrete Nails: Step-by-Step Guide
Installing concrete nails requires patience and the right tools to avoid bending the nail or damaging the masonry. Follow these steps for a successful installation:
Tools You’ll Need
Hammer (preferably a claw hammer or masonry hammer for extra force)
Drill with masonry bit (optional, for pre-drilling hard surfaces)
Tape measure and pencil (for marking the installation spot)
Safety goggles and work gloves (to protect against flying debris)
Step 1: Mark the Installation Spot
Use a tape measure and pencil to mark where you want to insert the nail. Double-check the position to ensure alignment—mistakes in marking can lead to unnecessary holes.
Step 2: Pre-Drill (If Needed)
For very hard masonry (e.g., solid concrete), pre-drilling a small pilot hole (slightly smaller than the nail’s diameter) can make installation easier. This prevents the nail from bending and reduces the risk of cracking the surface. Use a masonry bit and drill at a slow speed to avoid overheating.
Step 3: Position the Nail
Hold the nail upright at the marked spot, with the tip pressed firmly against the masonry. Keep your fingers away from the nail’s path to avoid injury.
Step 4: Hammer the Nail
Use steady, controlled blows with the hammer to drive the nail into the masonry. Start with light taps to set the nail in place, then gradually increase force. Avoid hitting the nail at an angle—this can bend it or cause it to slip.
Step 5: Check the Hold
Once the nail is fully inserted (with the head flush against the object), gently tug on the fastened item to ensure it’s secure. If it feels loose, remove the nail and try a longer or thicker model, or pre-drill a slightly smaller hole.
Safety Tips for Using Concrete Nails
Working with concrete nails and masonry can be hazardous—follow these safety guidelines to protect yourself:
Wear Protective Gear: Always use safety goggles to shield your eyes from flying masonry chips, and work gloves to prevent cuts or blisters from the hammer.
Use the Right Hammer: A masonry hammer (with a chisel end) is designed for concrete nails and provides better control than a standard claw hammer. Avoid using lightweight hammers, as they may not deliver enough force.
Avoid Over-Hammering: Excessive force can cause the nail to break, sending sharp pieces flying, or crack the masonry surface.
Keep Work Area Clear: Remove any debris or obstacles from the area to prevent trips or falls.
Store Nails Properly: Keep concrete nails in a sealed container or toolbox to avoid rust and ensure they’re not left scattered (a tripping or puncture hazard).
Common Mistakes to Avoid
Even experienced DIYers can make errors when using concrete nails. Here are the most common mistakes and how to prevent them:
Using the Wrong Nail Type: Using a smooth-shank nail for a heavy object will result in a weak hold. Always match the nail type to the project’s weight and masonry hardness.
Skipping Pre-Drilling: For hard concrete, skipping the pilot hole often leads to bent nails or cracked masonry. Take the extra time to pre-drill if needed.
Driving Nails at an Angle: Angled nails have less holding power and may damage the fastened object. Keep the nail straight during installation.
Using Rust-Prone Nails Outdoors: Uncoated steel nails will rust in damp conditions, weakening the hold and staining the masonry. Always use plastic-coated or stainless steel nails outdoors.

 Send Email